Experiencing electrical gremlins in your Mercedes-Benz W210 can be frustrating, especially when systems like windows, mirrors, seats, and steering adjustments suddenly become unresponsive. Often, these issues can be traced back to the Controller Area Network Bus (CAN Bus), the communication backbone of your vehicle’s electronics. This article will guide you through diagnosing CAN Bus problems in your W210, focusing on the often-misunderstood role of the OBD2 port.
In a recent case, a W210 owner encountered failures in their front door control modules (DCM) and lower control panel (LCP). Symptoms included inoperative front windows, side mirrors, seat adjustments, and steering wheel adjustment. Initially, resetting the fuses temporarily restored functionality, but the problem recurred, indicating a deeper issue within the CAN Bus system. Diagnostic scans confirmed an error on the CAN-Hi bus internal to the car.
It’s crucial to understand that the W210’s OBD2 port does not directly provide access to the CAN Bus system in the same way as later models equipped with CAN D. While modern OBD2 ports can be used with breakout boxes to monitor CAN Bus signals, the W210 requires a more hands-on approach to diagnose CAN Bus problems. This means you’ll need to access the CAN Bus directly at its junction block.
Accessing the W210 CAN Bus for Diagnostics
To effectively diagnose CAN Bus issues in a W210, you’ll need to bypass the OBD2 port for CAN Bus data and access the system directly. Here’s how:
-
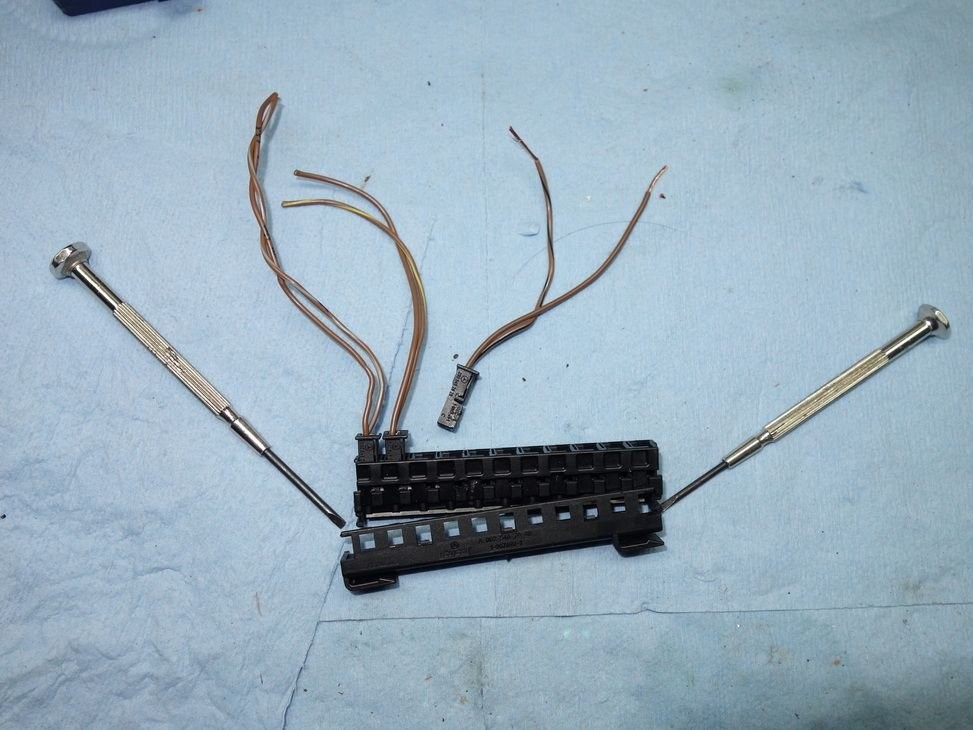
Prepare a Diagnostic Junction Block: Obtain a used junction block with CAN Bus connectors, readily available from online marketplaces. Carefully remove the locking cage using jeweler’s screwdrivers, gently prying apart the locking tabs. Extract a connector using needle-nose pliers or a small flat screwdriver, being careful not to pull on the wires and damage the connector. Strip a small portion of insulation from the wire ends for multimeter connection.
-
Locate the X30/7 Junction Block: Find the X30/7 junction block situated under the right front door sill of your W210. This block serves as a central connection point for the CAN B network.
-
Connect Diagnostic Connector and Multimeter: On the W210, the X30/7 junction block typically has one vacant slot out of eleven. Insert your prepared diagnostic connector into this open slot. Attach a multimeter to the connector to begin monitoring CAN Bus voltages.
Important: Never swap connectors between positions on the junction block. Each position corresponds to a specific component on the CAN Bus schematic. Incorrect connections will lead to misdiagnosis and wasted troubleshooting efforts. Refer to the W210 CAN B schematic for accurate connector positions.
Troubleshooting CAN Bus Faults: Voltage Monitoring and Component Isolation
With your multimeter connected, you can start monitoring CAN Bus voltages to pinpoint the source of the problem. In the example case, positions 1 (LCP), 6 (left front DCM), and 8 (right front DCM) were identified as potentially problematic.
By comparing measured voltages to expected values in both “Sleep” (key off) and “Awake” (key in position 1) states, anomalies can be detected. In this scenario, CAN Hi voltage was abnormally low when awake, and CAN Lo voltage was elevated when awake, indicating a fault.
To isolate the faulty component, systematically disconnect and reconnect each connector on the junction block, one at a time, while observing CAN Bus voltages. In this case, disconnecting connector 7 (left rear door) unexpectedly stabilized the CAN Bus voltages.
Further investigation revealed a short to chassis ground on the CAN Hi wire specifically when connector 7 was plugged into the left rear door. After removing the door panel and disconnecting the left rear door electronics, the short disappeared, pointing to a component within the door.
The Unexpected Culprit: Window Motor
The source of the CAN Bus issue turned out to be a faulty electric window motor in the left rear door. Despite the initial symptoms affecting front door components, the malfunctioning window motor, integrated into the CAN Bus network via its electronics, was dragging down the entire system.
Replacing the faulty window motor (part number 210-820-53-42) resolved the CAN Bus issue, restoring full functionality to all affected systems.
Conclusion
Diagnosing CAN Bus problems in a W210 Mercedes-Benz requires a different approach compared to later models with direct CAN Bus access through the OBD2 port. By understanding the W210’s CAN B system and utilizing the junction block for voltage monitoring and component isolation, you can effectively troubleshoot and resolve electrical issues. This case highlights that even seemingly unrelated components, like a window motor, can disrupt the entire CAN Bus network. Remember to always consult wiring diagrams and proceed methodically when diagnosing complex automotive electrical systems.