Are you having trouble connecting your WIFI OBD2 adapter to the Torque app? You’re not alone. Many users experience initial hiccups when setting up their WIFI OBD2 scanners. This guide, brought to you by the experts at obd2global.com, will walk you through the necessary steps to ensure a successful connection and get you started with vehicle diagnostics using Torque and your WIFI OBD2 device.
Step 1: Establish WIFI Connection Between Your Device and OBD2 Adapter
Before launching the Torque app, the first crucial step is to ensure your smartphone or tablet is properly connected to your WIFI OBD2 adapter. This is a separate process from within the Torque application itself.
If you haven’t yet configured this connection, detailed instructions are available for WIFI OBD2 adapter setup. In essence, you need to navigate to your device’s WIFI settings, search for available networks, and connect to the WIFI signal broadcast by your OBD2 adapter. Common names for these WIFI signals include “OBDII”, “WIFI ELM327”, or similar variations.
Important Pre-requisites:
- WIFI OBD2 Adapter Paired: Your WIFI OBD2 adapter should be successfully paired with your Android or iOS device at the WIFI network level.
- Ignition ON: Turn your car’s ignition to the “ON” position (one step before starting the engine). This powers up the OBD2 port and your adapter.
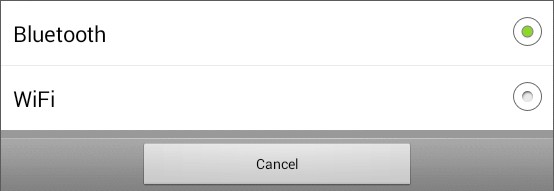 Selection screen within the Torque app, prompting users to choose between Bluetooth or WIFI connection types for their OBD2 adapter.
Step 2: Configure Torque App Connection Settings for WIFI OBD2
Once your device is connected to the WIFI OBD2 adapter at the network level, you need to instruct the Torque app to use this WIFI connection for communication. Torque, like most OBD2 apps, requires you to specify the connection type manually.
Here’s how to configure Torque settings for WIFI OBD2:
- Access Settings Menu: Open the Torque app on your device and locate the “Settings” menu. This is typically found via a menu icon or within the app’s main interface.
- Navigate to Connection Settings: Within the Settings menu, find and tap on “Connection”. This section manages how Torque communicates with your OBD2 adapter.
- Select WIFI Connection Type: In the “Connection” settings, you will see options for different connection types. Choose “WIFI” as your connection method. This tells Torque to look for a WIFI-based OBD2 adapter.
- Specify WIFI Device (If Necessary): Tap on “Device” within the Connection settings. In most cases, you can leave this setting at “WIFI ELM327” or a similar default WIFI option. Torque should automatically detect your WIFI OBD2 adapter. If you see specific WIFI device names listed (like “OBDII”, “WiFiOBD”, etc.), you can select one of those, but often the default WIFI setting works best. If the list is empty, that is also acceptable.
- Force Close and Restart Torque App: This is a critical step often overlooked. After making changes to the connection settings, you must completely close the Torque app. Use your device’s task manager or app management settings to force close Torque. Then, relaunch the Torque application. This ensures the new WIFI settings are properly applied.
After restarting Torque, the app should now be configured to communicate with your vehicle’s ECU via the WIFI OBD2 adapter. With the car ignition still in the “ON” position, Torque should establish a connection.
Troubleshooting Connection Issues:
If Torque detects your WIFI OBD2 adapter but still fails to connect to your car’s ECU, the most common reason is OBD2 incompatibility. Check if your car is OBD2 compatible. Vehicles manufactured before 1996 are often not OBD2 compliant. For non-OBD2 vehicles, professional diagnostic tools may be required.
By following these steps, you should be able to successfully connect your WIFI OBD2 adapter to the Torque app and begin diagnosing your vehicle.