When your vehicle’s performance takes a hit, fuel efficiency drops, or the dreaded check engine light illuminates, your car might be signaling an issue with its oxygen (O2) sensor. This crucial component plays a vital role in your engine’s management system, diligently monitoring the exhaust gases to ensure optimal air-fuel mixture and efficient engine operation. For car owners and DIY enthusiasts, an OBD2 scanner becomes an indispensable tool for diagnosing such sensor-related problems right at home.
This guide will walk you through the process of oxygen sensor testing using an OBD2 scanner, empowering you to understand your car’s health and potentially save on costly mechanic visits. We’ll delve into how to connect your scanner, interpret the data, and troubleshoot common issues.
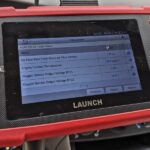
Alt text: Foxwell NT530 OBD2 scanner displaying full system diagnostic capabilities, ideal for oxygen sensor testing and comprehensive vehicle health checks.
Before we jump into the practical steps of using an OBD-II scanner for O2 sensor diagnostics, let’s briefly understand the sensor’s function and why testing it is important. The oxygen sensor, often located in the exhaust manifold and sometimes after the catalytic converter, measures the amount of oxygen in the exhaust gas. This data is relayed back to the Engine Control Unit (ECU), which then adjusts the air-fuel mixture to achieve the perfect stoichiometric ratio for clean and efficient combustion. A faulty O2 sensor can lead to a rich or lean fuel mixture, resulting in reduced fuel economy, increased emissions, and potential engine damage over time.
Whether you are using a dedicated scan tool like the FOXWELL NT909 or a more basic OBD2 scanner, the fundamental process for oxygen sensor testing remains similar and remarkably user-friendly.
Step-by-Step Guide: Testing Your Oxygen Sensor with an OBD2 Scanner
Diagnosing an O2 sensor issue with an OBD2 scanner is a straightforward process, even for those with limited automotive experience. Here’s a step-by-step guide to get you started:
1. Locate the OBD-II Port: The first step is to find your vehicle’s OBD-II port. Since 1996, most vehicles are equipped with this standardized port, typically located under the dashboard on the driver’s side, near the steering column. Refer to your car’s manual if you have trouble locating it.
2. Connect Your OBD-II Scanner: Once you’ve found the port, firmly plug in your OBD2 scanner. Ensure a secure connection for proper communication between the scanner and your car’s computer system.
3. Turn On Ignition and Scanner: Turn your car’s ignition to the “ON” position, but do not start the engine unless specifically instructed by your scanner. Power on your OBD2 scanner. It should automatically connect to your vehicle’s ECU.
4. Navigate to Live Data or O2 Sensor Test: Most OBD2 scanners have a user-friendly menu. Look for options like “Live Data,” “Sensor Readings,” or specifically an “O2 Sensor Test.” The exact menu names may vary depending on your scanner model. For example, on a FOXWELL NT909, you can easily navigate to the “Live Data” section to monitor O2 sensor readings in real-time.
5. Select Oxygen Sensor Parameters: Within the live data menu, you’ll likely see a list of parameters you can monitor. Select the oxygen sensor readings. You may see readings for multiple sensors, such as “Bank 1 Sensor 1,” “Bank 1 Sensor 2,” “Bank 2 Sensor 1,” and so on. Bank 1 usually refers to the side of the engine with cylinder number 1, and Sensor 1 is typically located before the catalytic converter (upstream sensor), while Sensor 2 is after the catalytic converter (downstream sensor).
Understanding and Analyzing Oxygen Sensor Data
This is where the real diagnosis begins. The oxygen sensor communicates with the ECU through voltage signals. A healthy upstream O2 sensor should exhibit a voltage that fluctuates rapidly between approximately 0.1V and 0.9V. This fluctuation indicates the sensor is actively monitoring oxygen levels and responding to changes in the exhaust gas composition.
Key Indicators of a Healthy O2 Sensor:
- Voltage Range: Look for voltage readings that oscillate between 0.1V and 0.9V.
- Rapid Fluctuations: The voltage should change quickly and frequently, reflecting the engine’s dynamic operation. A slow or sluggish response time can indicate a failing sensor.
- Consistent Pattern: The fluctuations should be relatively consistent, without being stuck at a high or low voltage for extended periods.
Interpreting Abnormal O2 Sensor Readings:
- Stuck at High Voltage (around 0.9V): This often indicates a “rich” condition, meaning there is too much fuel and not enough oxygen in the exhaust. It could suggest the sensor is detecting a genuinely rich mixture or is falsely reporting rich due to a sensor malfunction.
- Stuck at Low Voltage (around 0.1V): This typically points to a “lean” condition, meaning there is too much oxygen and not enough fuel. Similar to the rich condition, this could be a real lean mixture or a sensor issue.
- Slow Response Time: If the voltage changes are slow and sluggish, the sensor might be degraded or contaminated, hindering its ability to accurately monitor oxygen levels.
- No Voltage Change (Flat Line): A flat line reading at any voltage level is a strong indicator of a malfunctioning sensor that is not responding at all.
In addition to voltage readings, pay attention to Fuel Trim values – Short-Term Fuel Trim (STFT) and Long-Term Fuel Trim (LTFT). These values represent the ECU’s adjustments to the fuel mixture based on the O2 sensor’s input. Excessive positive or negative fuel trim values can also indirectly point to O2 sensor issues, as the ECU may be constantly trying to compensate for inaccurate sensor readings.
Decoding O2 Sensor Trouble Codes
OBD2 scanners are invaluable for retrieving Diagnostic Trouble Codes (DTCs) that can pinpoint potential O2 sensor problems. When your scanner displays a code, it’s providing a crucial clue about what might be amiss.
Common O2 Sensor Related Trouble Codes:
- P0130 – O2 Sensor Circuit Malfunction (Bank 1, Sensor 1): This code suggests a general electrical issue with the upstream O2 sensor in Bank 1. It could be the sensor itself, wiring problems, or issues with the sensor’s heater circuit.
- P0135 – O2 Sensor Heater Circuit Malfunction (Bank 1, Sensor 1): This specifically points to a problem with the heater element within the upstream O2 sensor in Bank 1. Many O2 sensors have heaters to quickly bring them to operating temperature for accurate readings.
- P0171 – System Too Lean (Bank 1): While not directly an O2 sensor code, P0171 (and P0174 for Bank 2) can be triggered by a faulty O2 sensor providing incorrect lean readings to the ECU. However, lean codes can also be caused by vacuum leaks, fuel delivery issues, or other problems.
- P0172 – System Too Rich (Bank 1): Similarly, P0172 (and P0175 for Bank 2) can be related to an O2 sensor falsely reporting a rich condition, but other causes like fuel injector leaks or pressure regulator issues should also be considered.
Diagnosing Trouble Codes Systematically:
- Record the Code: Note down the exact DTC displayed by your OBD2 scanner.
- Research the Code: Use your scanner’s built-in code lookup function or consult online resources or repair manuals to understand the code’s description and potential causes.
- Inspect Wiring and Connections: For codes like P0130 or P0135, visually inspect the wiring and connectors associated with the indicated O2 sensor. Look for frayed wires, loose connections, or corrosion.
- Test the Heater Circuit: If you suspect a heater circuit issue (e.g., P0135), use a multimeter to check the heater circuit for continuity. Lack of continuity suggests a faulty heater element.
- Analyze Live Data: After addressing any obvious wiring issues, use your OBD2 scanner to monitor live O2 sensor data. Compare the readings to the expected values and look for the indicators of a healthy or faulty sensor mentioned earlier.
Avoiding Common Misdiagnoses:
It’s crucial to remember that O2 sensor codes don’t always mean the sensor itself is defective. Here are some common pitfalls to avoid:
- Don’t Automatically Replace the Sensor: Codes like P0171 or P0172 can be triggered by various issues beyond the O2 sensor. Investigate other potential causes like vacuum leaks, fuel system problems, or exhaust leaks before replacing the sensor.
- Check for Exhaust Leaks: An exhaust leak near an upstream O2 sensor can introduce extra oxygen into the exhaust stream, causing the sensor to read lean and potentially trigger false codes. Listen for hissing sounds and inspect the exhaust system for leaks.
- Rule Out Basic Maintenance Issues: Simple things like a dirty air filter, a loose fuel cap, or poor fuel quality can sometimes mimic O2 sensor problems or contribute to related codes. Address these basic maintenance items before assuming a sensor failure.
Alt text: Foxwell NT710 professional diagnostic scanner displaying system diagnostic menu, suitable for advanced oxygen sensor analysis and comprehensive car system checks.
Recognizing Symptoms of a Failing O2 Sensor
Even without an OBD2 scanner, you might notice symptoms that suggest a potential O2 sensor problem:
- Decreased Fuel Economy: A faulty O2 sensor can cause the engine to run rich, wasting fuel and reducing mileage.
- Rough Idle: An incorrect air-fuel mixture due to a bad sensor can lead to an unstable or rough idle.
- Check Engine Light: The check engine light illuminating is often the first sign of an O2 sensor issue, triggering related DTCs.
- Failed Emissions Test: A malfunctioning O2 sensor can increase harmful emissions, causing your vehicle to fail emissions testing.
- Hesitation or Misfires: In some cases, a bad O2 sensor can contribute to engine hesitation during acceleration or even misfires.
Conclusion: Empowering DIY Car Diagnostics
Oxygen sensor testing using an OBD2 scanner is a valuable skill for any car owner wanting to understand their vehicle better and perform basic diagnostics at home. By following these steps and understanding the data, you can effectively assess your O2 sensor’s health, potentially identify problems early, and make informed decisions about maintenance and repairs. Regular checks with your OBD2 scanner can contribute to better engine performance, improved fuel efficiency, and a healthier car overall, saving you time and money in the long run.
FAQs about Oxygen Sensor Testing with OBD2 Scanners
How do I read O2 sensor data on my scan tool?
Connect your OBD2 scanner, navigate to “Live Data” or “Sensor Readings,” and select the oxygen sensor parameters. Monitor the voltage readings, looking for fluctuations between 0.1V and 0.9V for upstream sensors.
What are the common signs of a bad O2 sensor?
Common signs include reduced fuel economy, rough idling, check engine light illumination, failed emissions tests, and potential engine performance issues like hesitation or misfires.
Can I use a multimeter to test an O2 sensor?
Yes, you can use a multimeter to check the voltage output of an O2 sensor. Set your multimeter to DC voltage, connect the probes to the sensor’s signal and ground wires, and observe the voltage fluctuations with the engine running. However, an OBD2 scanner provides a more comprehensive diagnostic approach, including trouble codes and live data streams.
You Might Also Like:
- [Link to related article on OBD2 scanner maintenance]
- [Link to article on understanding fuel trims]