For Tesla Model 3 and Model Y owners, accessing vehicle data for diagnostics or adding aftermarket accessories can be a challenge due to the absence of a traditional OBD2 port. Fortunately, an OBD2 adapter provides a seamless solution, bridging this gap and unlocking a world of possibilities for your electric vehicle. This guide will walk you through everything you need to know about the Model 3 Obd2 Adapter, including its purpose, installation, and benefits.
This ingenious adapter is designed to integrate into your Tesla’s existing wiring system without making any permanent modifications. It acts as an intermediary, connecting to the internal connectors located within the center console (specifically, in the rear footwell area under a small cover). By placing the adapter in this location, it simply taps into the data streams already present in your car’s network, making them accessible via a standard OBD2 port. This means you can connect a variety of OBD2 devices, such as Bluetooth dongles or specialized modules like the XBB Dongle for auxiliary lighting control, to enhance your Tesla’s functionality and monitoring capabilities.
Why Use an OBD2 Adapter for Your Tesla Model 3?
While modern vehicles, including the Tesla Model 3, are technologically advanced, the traditional OBD2 port serves as a universal gateway for accessing vehicle diagnostics and data. Here’s why adding an OBD2 adapter to your Model 3 can be beneficial:
- Diagnostic Access: Retrieve real-time data about your Tesla’s performance, battery health, motor function, and more. This is invaluable for monitoring your vehicle’s condition and identifying potential issues early on.
- Performance Monitoring: Use OBD2-compatible apps and devices to track metrics like speed, acceleration, battery voltage, and energy consumption. This data can be insightful for optimizing driving efficiency and understanding your Tesla’s performance characteristics.
- Accessory Integration: Connect aftermarket accessories that rely on OBD2 data, such as auxiliary lights triggered by vehicle signals (using devices like the XBB Dongle mentioned in the original article).
- Customization and Data Logging: For advanced users, an OBD2 adapter enables deeper access for customization and data logging, allowing for in-depth analysis of vehicle behavior.
Installing Your Model 3 OBD2 Adapter: A Step-by-Step Guide
Important Safety Precautions:
Before you begin the installation process, it is crucial to prioritize safety. Ensure your Tesla Model 3 is completely powered down. This is not simply turning off the touchscreen; a full power down is necessary to prevent electrical issues during installation.
-
Disable Sentry Mode: Using your Tesla mobile app or the car’s touchscreen (Controls -> Safety -> Sentry Mode = Off), disable Sentry Mode. This reduces power draw during shutdown.
-
Initiate Power Off: Fully open the driver’s side window and close the driver’s door. Open a rear door for easy access later. Through the open window, use the touchscreen to power off the car: Controls -> Safety -> Power Off.
-
Wait for Complete Shutdown: Crucially, wait 8-10 minutes after initiating power off. You will hear a relay “click” indicating partial shutdown, but continue waiting until all humming or electrical noises from the car cease. This ensures all systems, including CAN buses and relays, are fully deactivated.
-
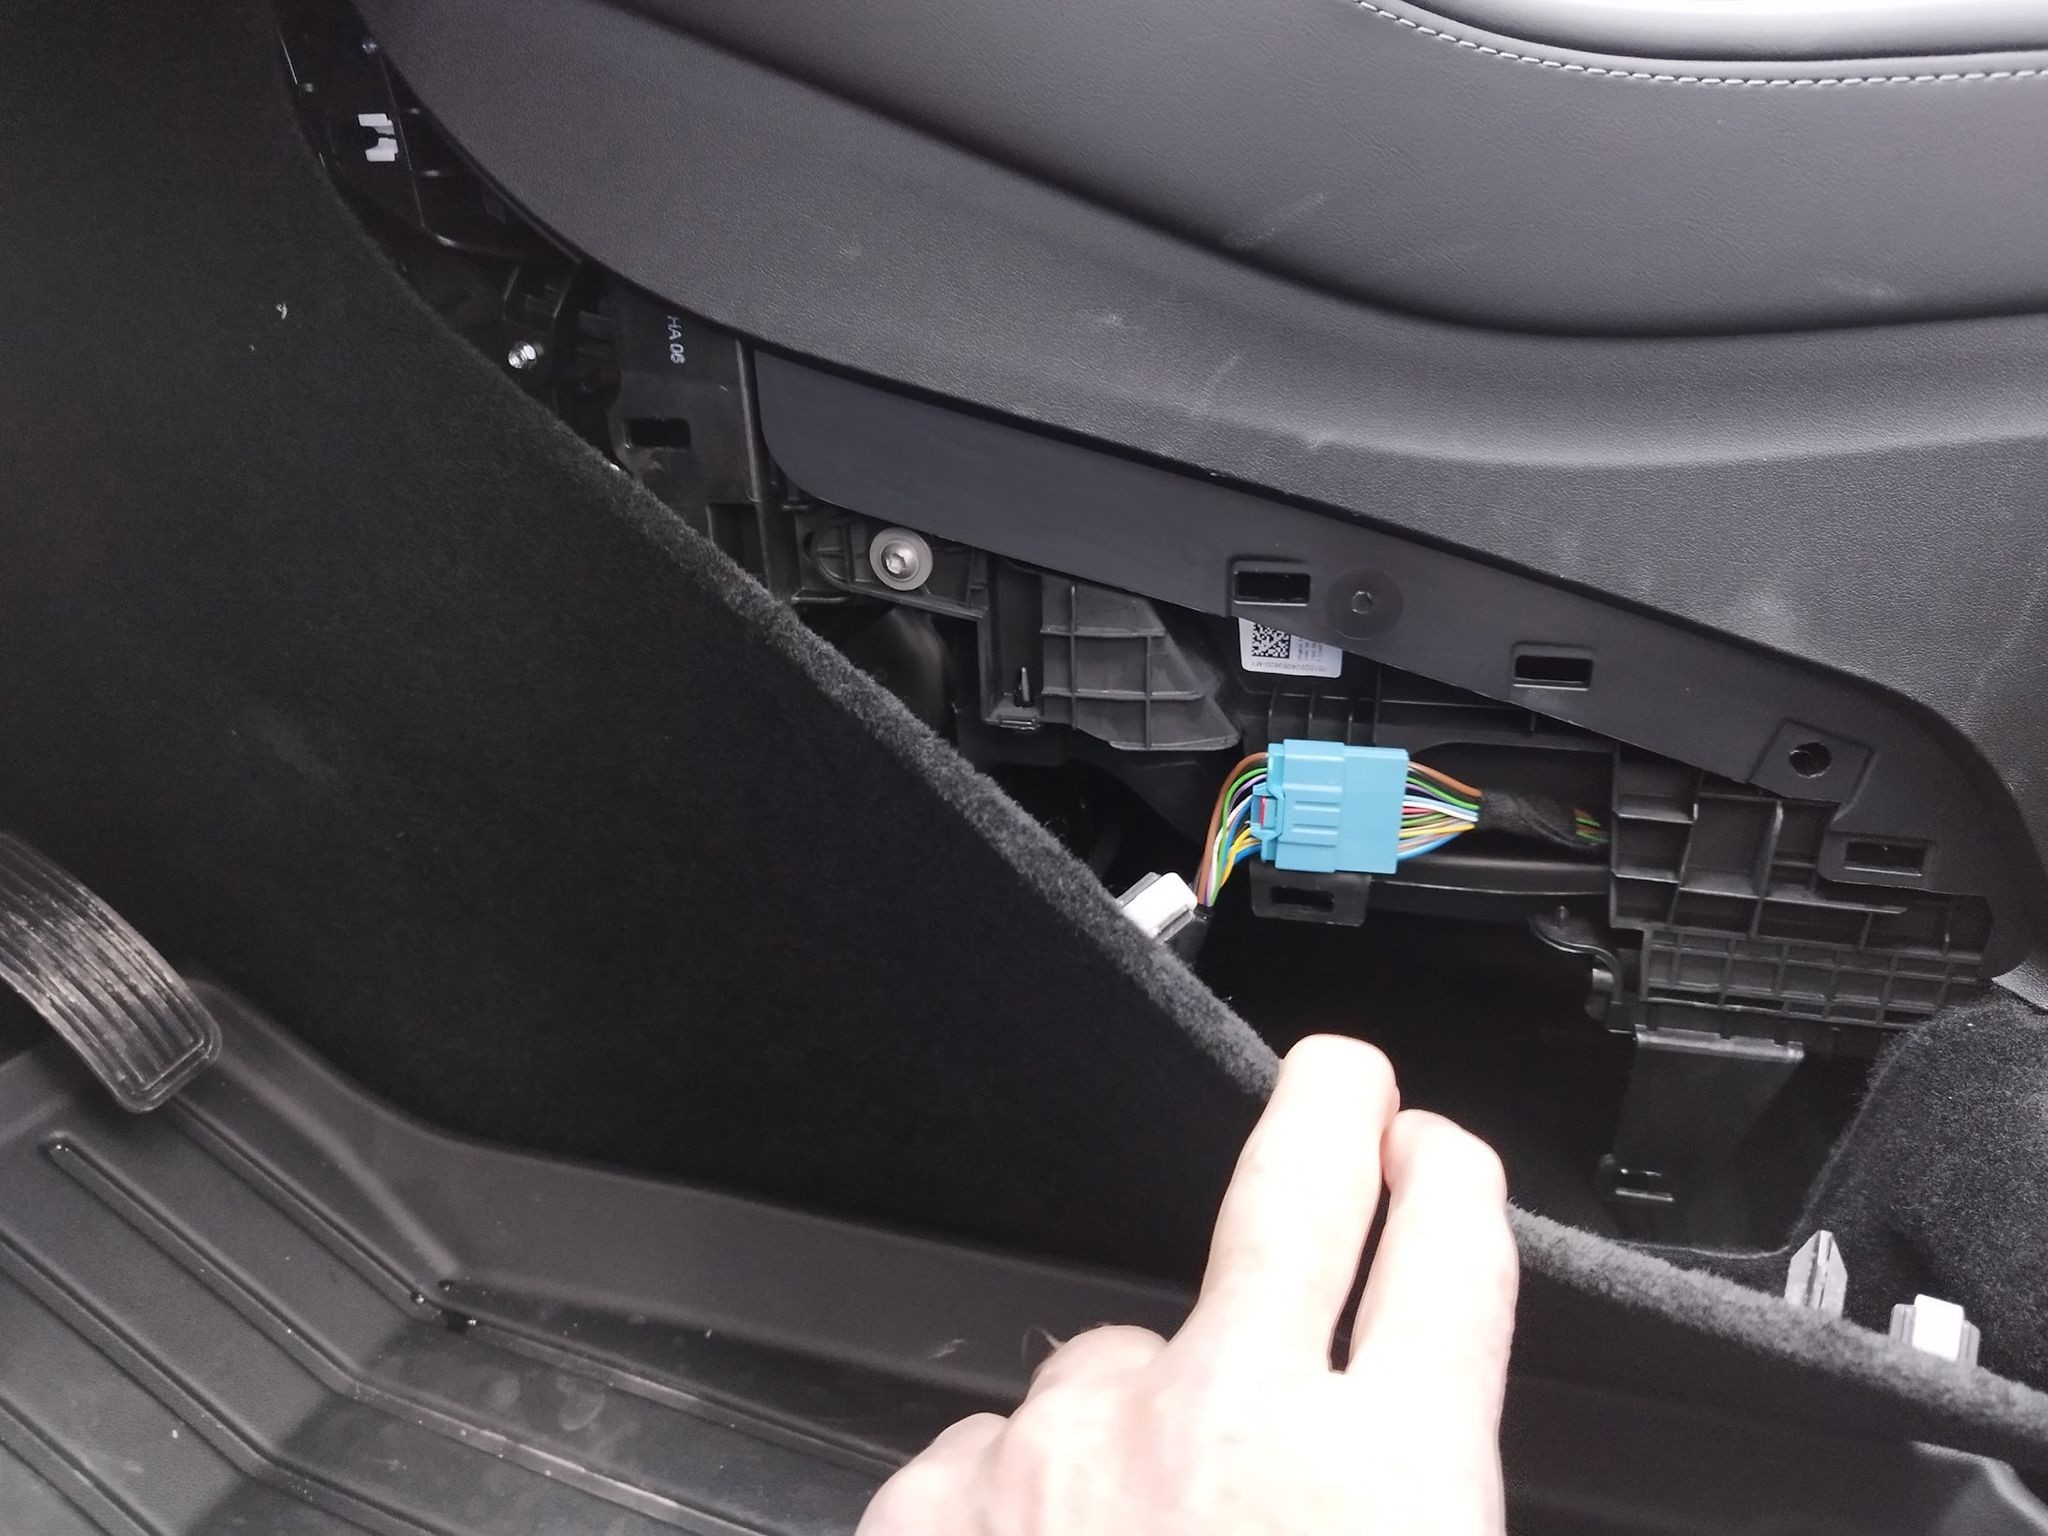
Access the Connector: In the rear footwell, locate the protective cover. This cover is secured by 5 clips. Carefully pull or pry to release the clips and remove the cover, exposing the wiring harness and connectors.
-
Connect the OBD2 Adapter: Disconnect the existing connector in the wiring harness. Insert the Model 3 OBD2 adapter between these disconnected connectors, ensuring a secure and proper connection on both ends.
-
Secure and Conceal: Once connected, carefully close the protective cover. You can optionally route the OBD2 port cable to a more accessible location, such as under the rear footwell trim or beneath the front seats. This eliminates the need to reopen the cover for future OBD2 device connections.
Important Note for 2024+ Model 3:
For the new 2024 and onwards Model 3, the OBD2 adapter installation location has changed. Instead of the rear footwell, the connector is now located in the driver’s footwell, behind a panel on the right side, near the accelerator pedal. The installation process remains similar, but the access point is different. Refer to the image below for the location in the newer model.
Disclaimer: Installation should be performed with caution. Valostore and obd2global.com are not responsible for any damage resulting from improper installation. If you are uncomfortable with this procedure, seek professional assistance.
Conclusion: Unlock Your Tesla’s Potential
Adding an OBD2 adapter to your Tesla Model 3 or Model Y is a straightforward yet powerful modification. It grants you access to valuable vehicle data, enables the use of OBD2-compatible accessories, and enhances your overall ownership experience. By following this guide and taking necessary safety precautions, you can easily unlock a new layer of insight and functionality from your electric vehicle. Explore the possibilities and take control of your Tesla’s data today!