Delve into the world of vehicle diagnostics with the Arduino Obd2 Project, a fascinating intersection of automotive technology and DIY electronics. This guide provides an entry point into understanding how you can use an Arduino to tap into your car’s onboard computer system, opening up possibilities for custom dashboards, performance monitoring, and insightful data logging.
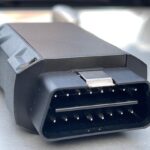
At the heart of most Arduino OBD2 projects lies the ELM327 chip. Developed by Elm Electronics, the ELM327 is essentially a microcontroller firmware that acts as a translator. Modern vehicles utilize a standardized OBD2 (On-Board Diagnostics II) port, but communicate using a variety of complex protocols. The ELM327 chip bridges this gap by decoding these intricate vehicle protocols and converting them into simple ASCII commands. This standardized output is crucial, allowing a wide range of devices, including Arduino, to easily communicate with your car’s Engine Control Unit (ECU).
Think of the ELM327 as the interpreter that speaks “car language” and translates it into a language Arduino can understand. These chips are widely available inexpensively from online marketplaces, often as USB, Bluetooth, Serial, or WiFi interfaces. For Arduino projects, a serial TTL compatible ELM327 interface is particularly useful, as it allows direct connection to the Arduino’s I/O pins, simplifying the communication pathway.
To start your Arduino OBD2 project, you’ll need to understand basic AT commands, which are used to control the ELM327 chip itself. For instance, sending the command ATI will typically return the ELM327 version. Once connected to your car’s OBD2 port, the ATRV command will read the vehicle’s battery voltage. Beyond these basic commands, the real power lies in OBD “PIDs” (Parameter IDs). These PIDs are standardized codes used to request specific data points from the ECU, such as engine temperature, RPM, speed, and much more. A comprehensive list of OBD2 PIDs can be readily found online, including resources like the Wikipedia page on OBD-II PIDs.
While OBD2 primarily functions as a read-only system for monitoring vehicle data, it offers a wealth of information for enthusiasts and DIYers. With an Arduino and ELM327, you can create custom gauges, log performance data for analysis, or even build your own diagnostic tools. It’s important to note that while reading data is relatively straightforward, attempting to actively control or emulate the ECU communication protocols is significantly more complex. These protocols are intricate and often proprietary, designed with security and vehicle integrity in mind.
In conclusion, the Arduino OBD2 project offers a fantastic avenue for exploring automotive electronics and gaining deeper insights into your vehicle’s operation. By leveraging the ELM327 interface and Arduino’s versatility, you can unlock a world of vehicle data and create innovative DIY automotive applications. Start with understanding the basic AT commands and OBD2 PIDs, and you’ll be well on your way to building your own custom car diagnostics and monitoring system.
References:
- Elm Electronics: http://elmelectronics.com/obdic.html#ELM327